![Four Simple Steps To Post To Twitter Using Python](/images/blogHeaderImages/2017-11-03-step_by_step_tutorial_to_post_to_twitter_using_python.jpg)
Four Simple Steps To Post To Twitter Using Python
NOTE:
Don't miss the part 2 of this blog post: Posting Photos to Twitter with Python
Automating Twitter can be an easy coding exercise once you have everything set up, but figuring out all the steps that Twitter puts you through to generate your access keys and tokens can be a challenge. I put these four steps together to make it easier to walk to the process, hopefully it's useful for someone else out there.
- Create An Application On app.twitter.com
- Install Python Dependencies
- Write The Python Code
- Post Your First Tweet
TLDR;
If you just want the code, you can grab the code repo for this tutorial here: https://github.com/mattccrampton/post_to_twitter_using_python
![Fork me on GitHub](https://github.blog/wp-content/uploads/2008/12/forkme_right_darkblue_121621.png?resize=149%2C149)
Step #1 - Create An Application on app.twitter.com
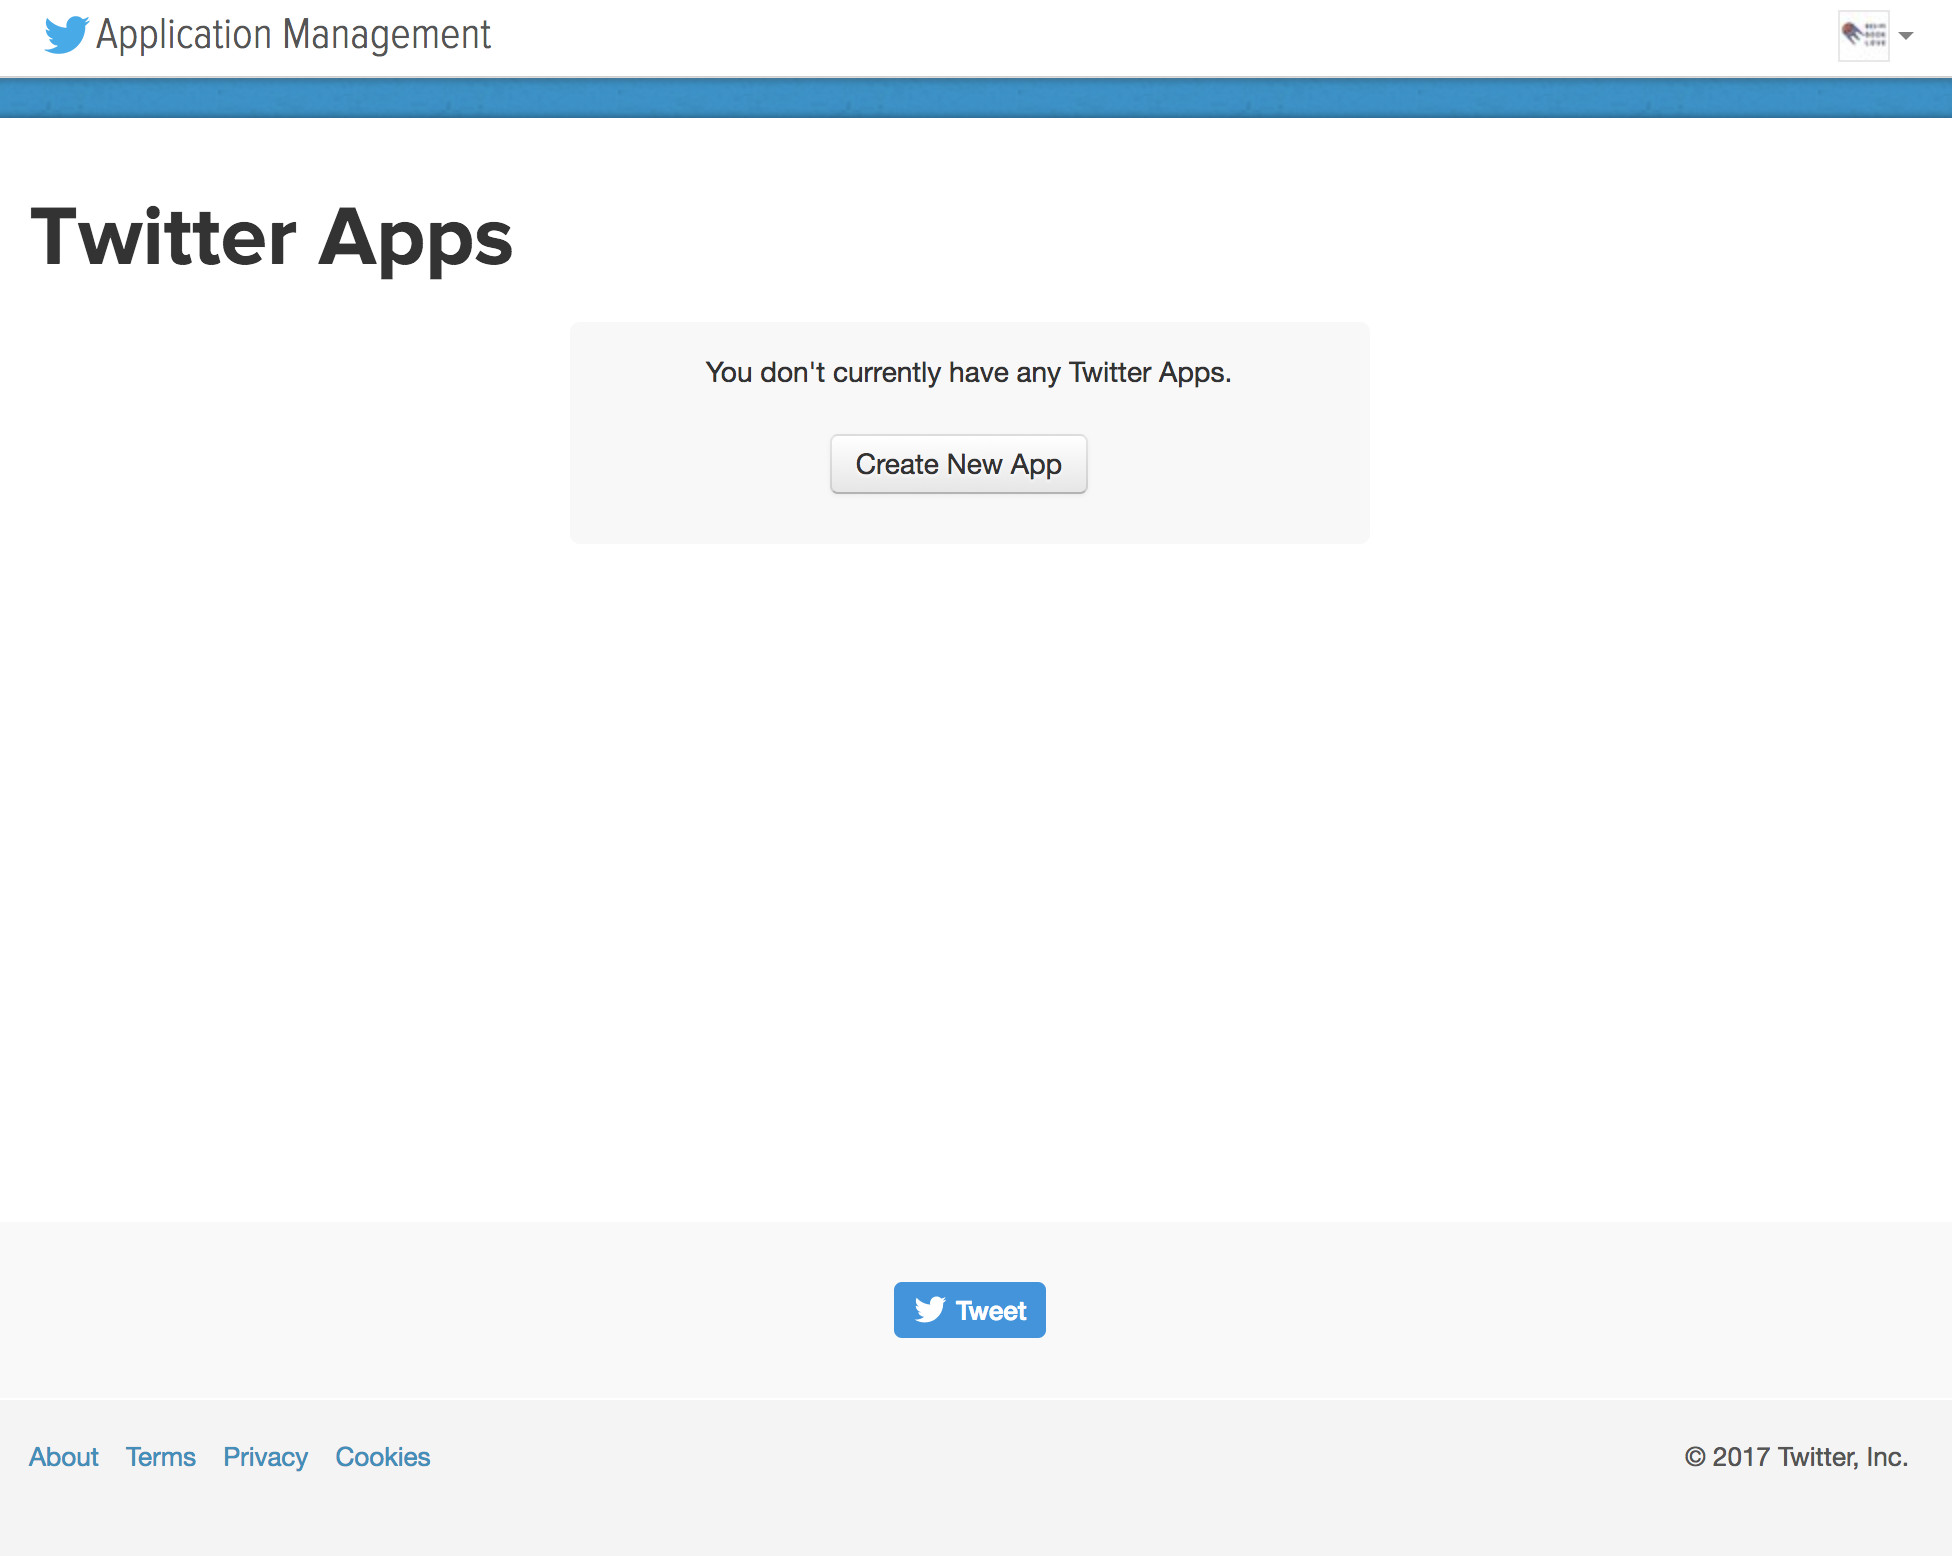
First head over to https://apps.twitter.com/, sign in to your twitter account and then click on the "Create New App" button.
![Adding a new app to twitter](/images/blogImages/2017-11-03-step_by_step_tutorial_to_post_to_twitter_using_python/1-no_apps.jpg)
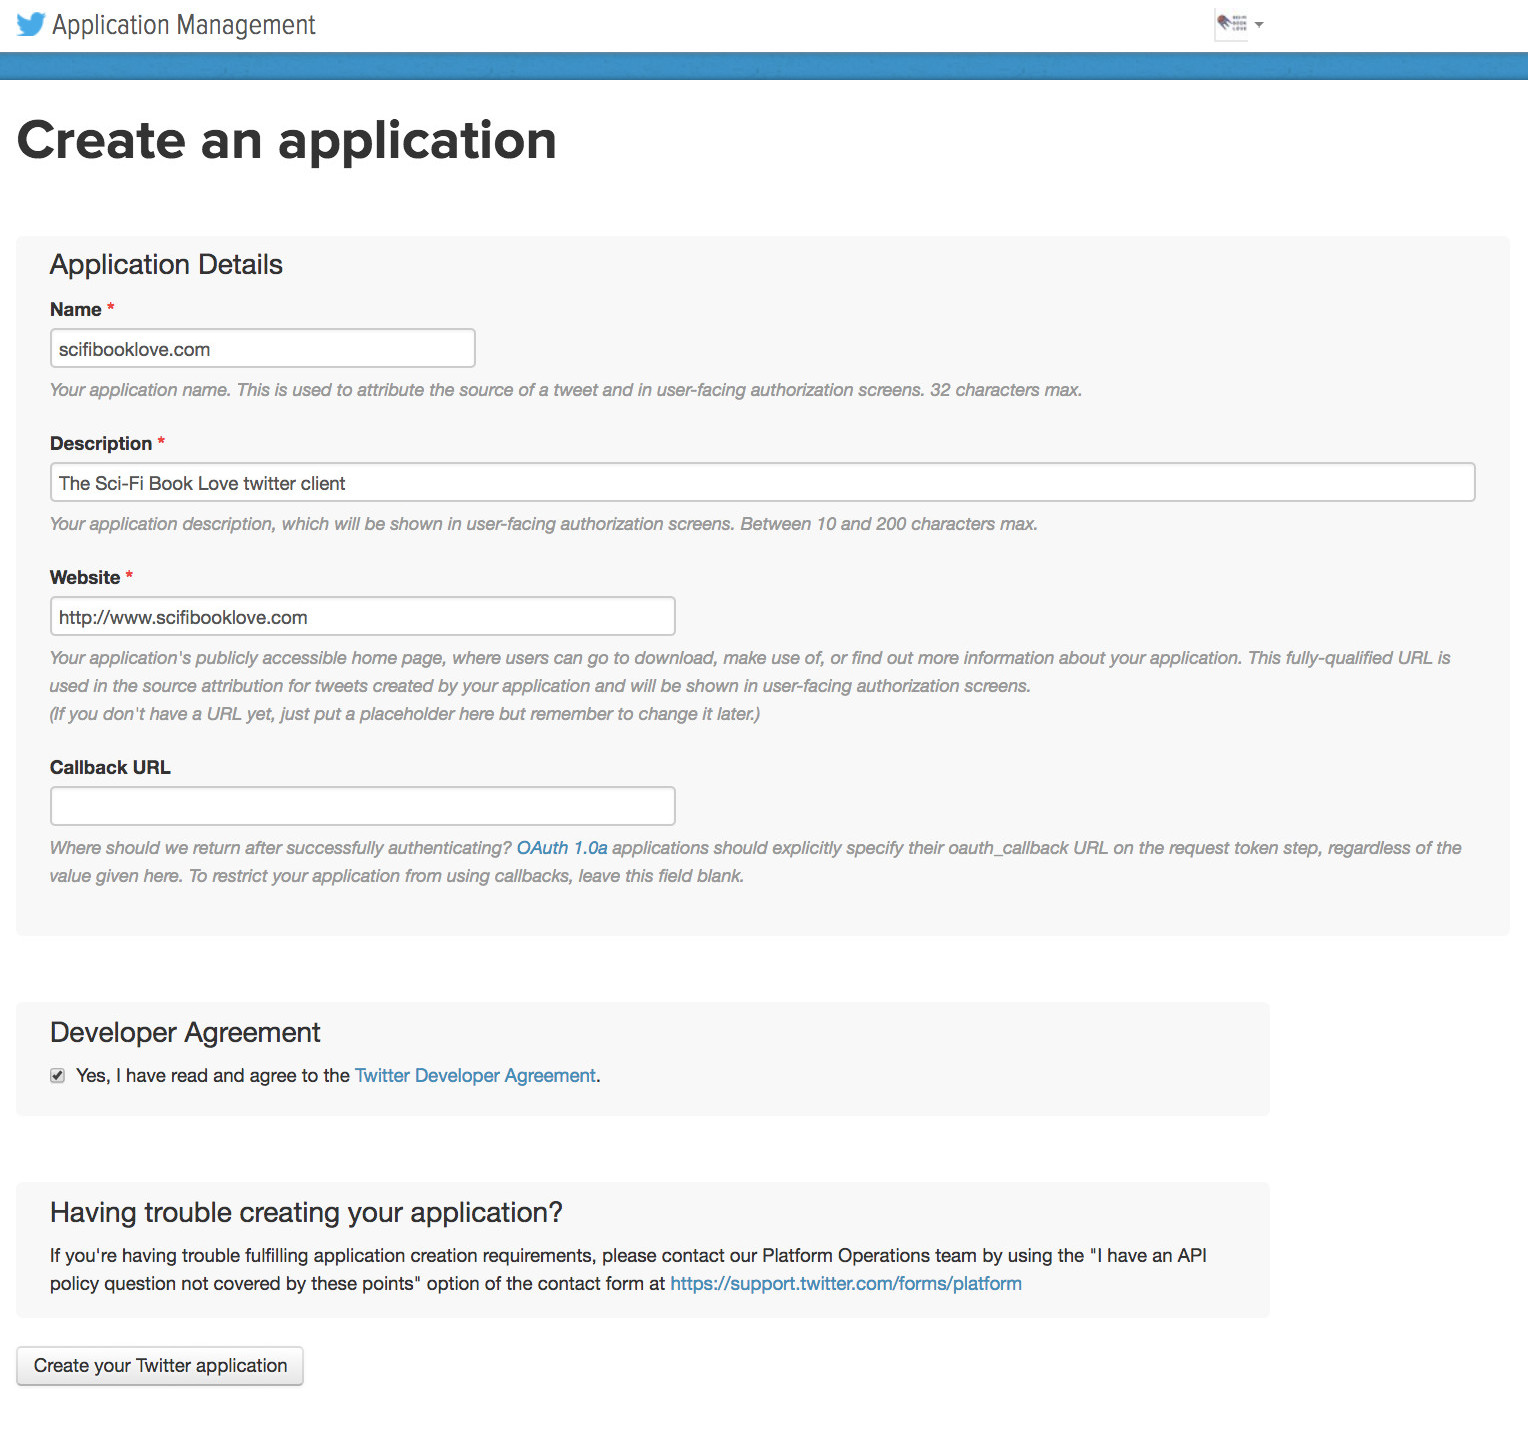
Enter your application's information. For the purposes of this demo I'm creating an application to post to the @scifibooklove twitter acount, so I'm entering information relevant to that website.
Note: Leave the Callback URL field blank.
Once you're done, click "Create your Twitter application".
![](/images/blogImages/2017-11-03-step_by_step_tutorial_to_post_to_twitter_using_python/2-account_info.jpg)
You'll be taken to its detail page with some standard information about the app you've created. Much of this information will be relevant if you decide in the future to build twitter authentication into your web or mobile app or to authenticate on behalf of other users.
But for our simple example we won't be needing much of the data on this page.
![](/images/blogImages/2017-11-03-step_by_step_tutorial_to_post_to_twitter_using_python/3-complete.jpg)
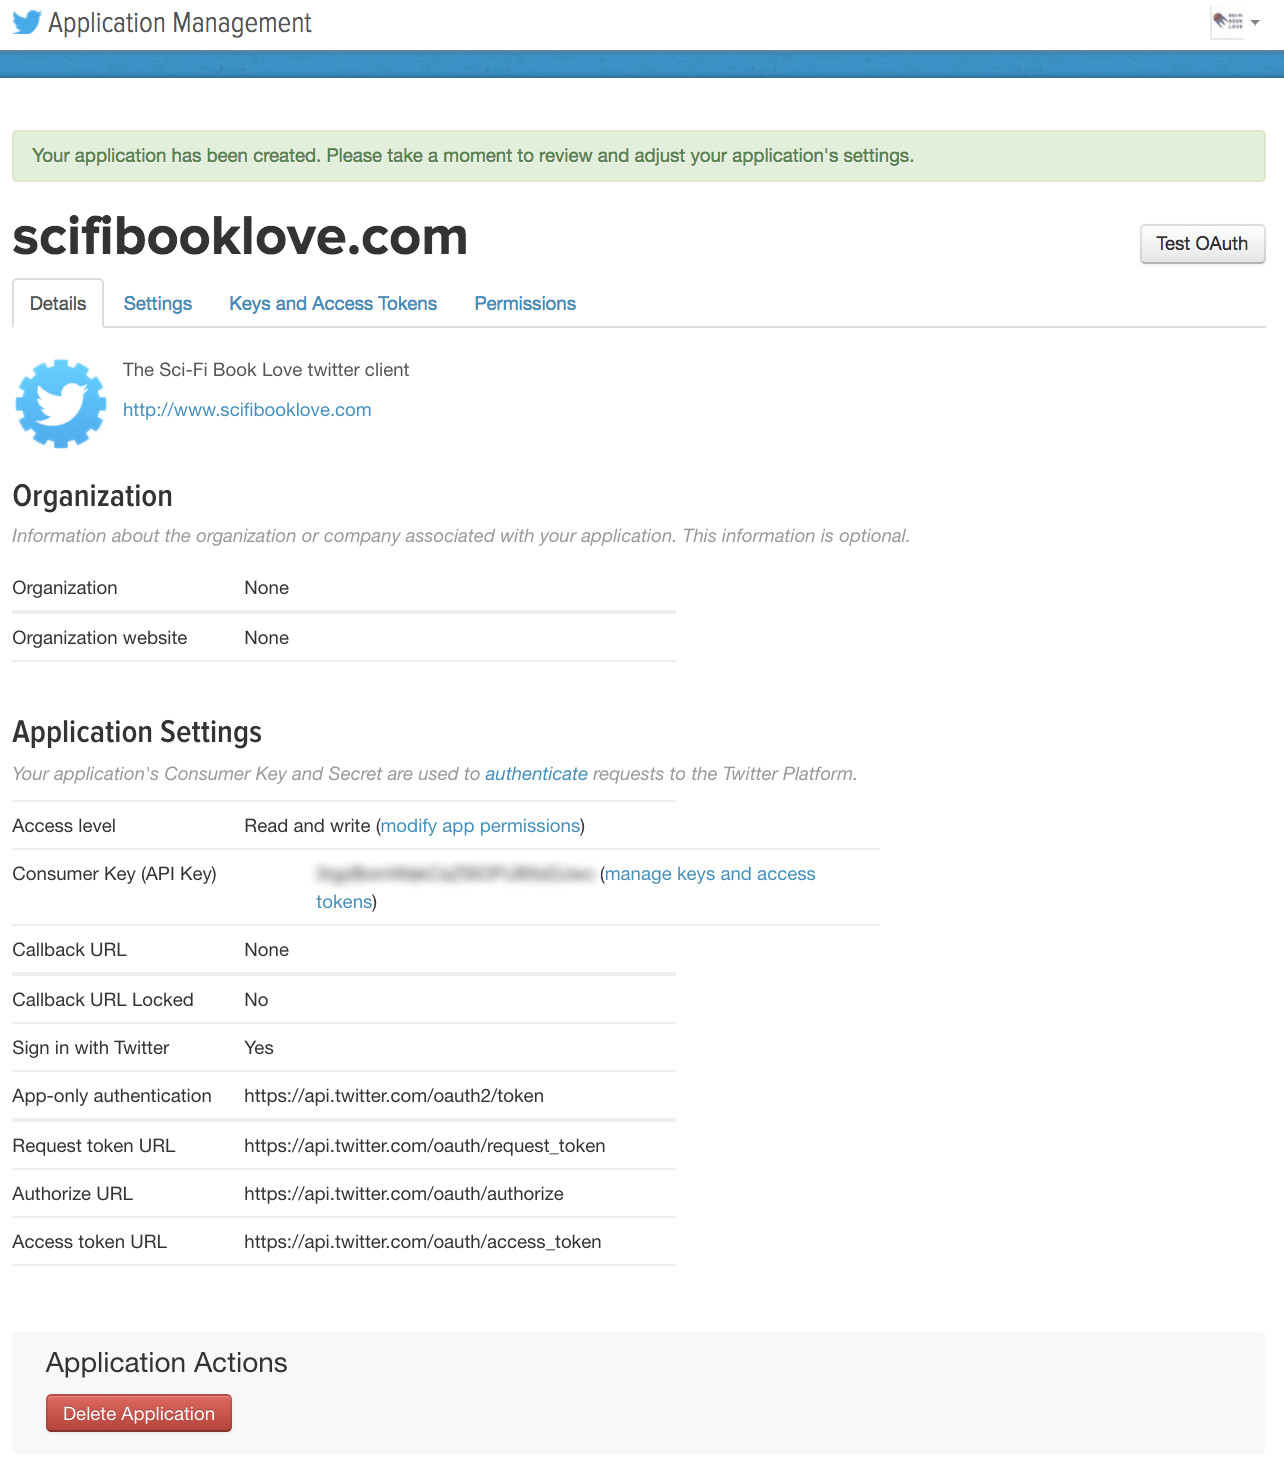
Click over to the "Keys and Access Tokens" tab. This page shows your "Consumer Key" and "Consumer Secret" which are two of the four twitter-generated strings we're going to need to pass into the python code we're going to write.
![](/images/blogImages/2017-11-03-step_by_step_tutorial_to_post_to_twitter_using_python/4-keys.jpg)
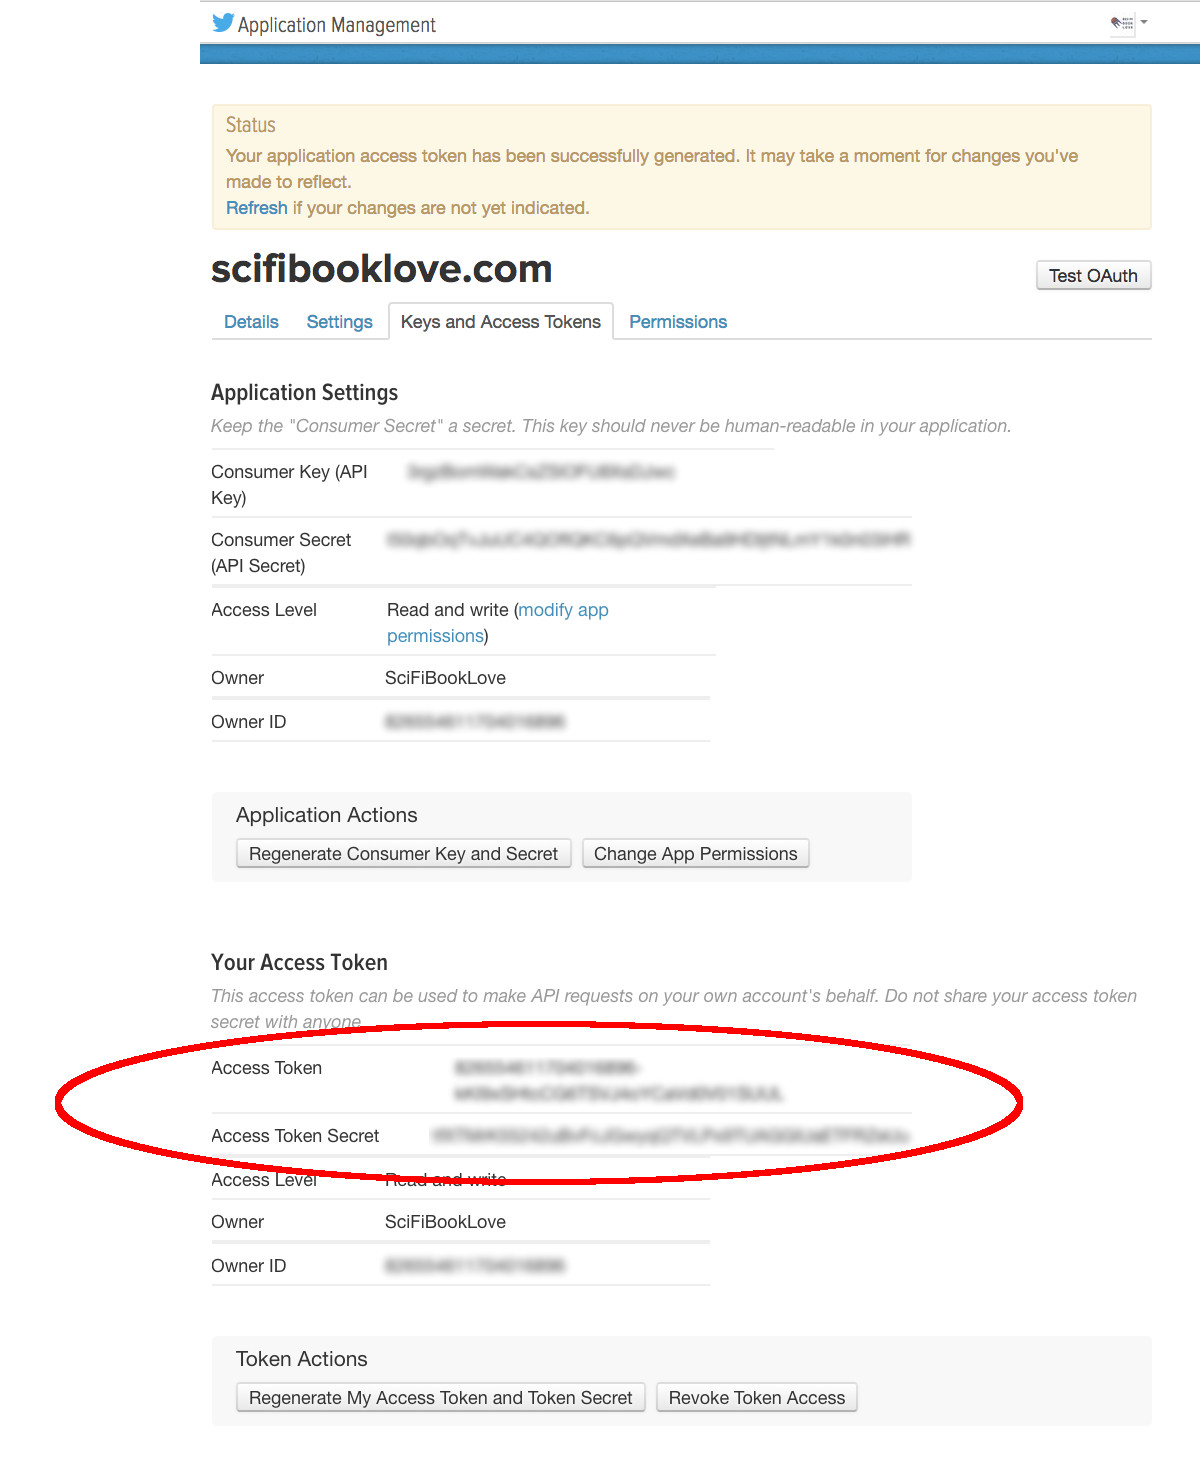
Now click on the "Create my access token" button.
![](/images/blogImages/2017-11-03-step_by_step_tutorial_to_post_to_twitter_using_python/5-token.jpg)
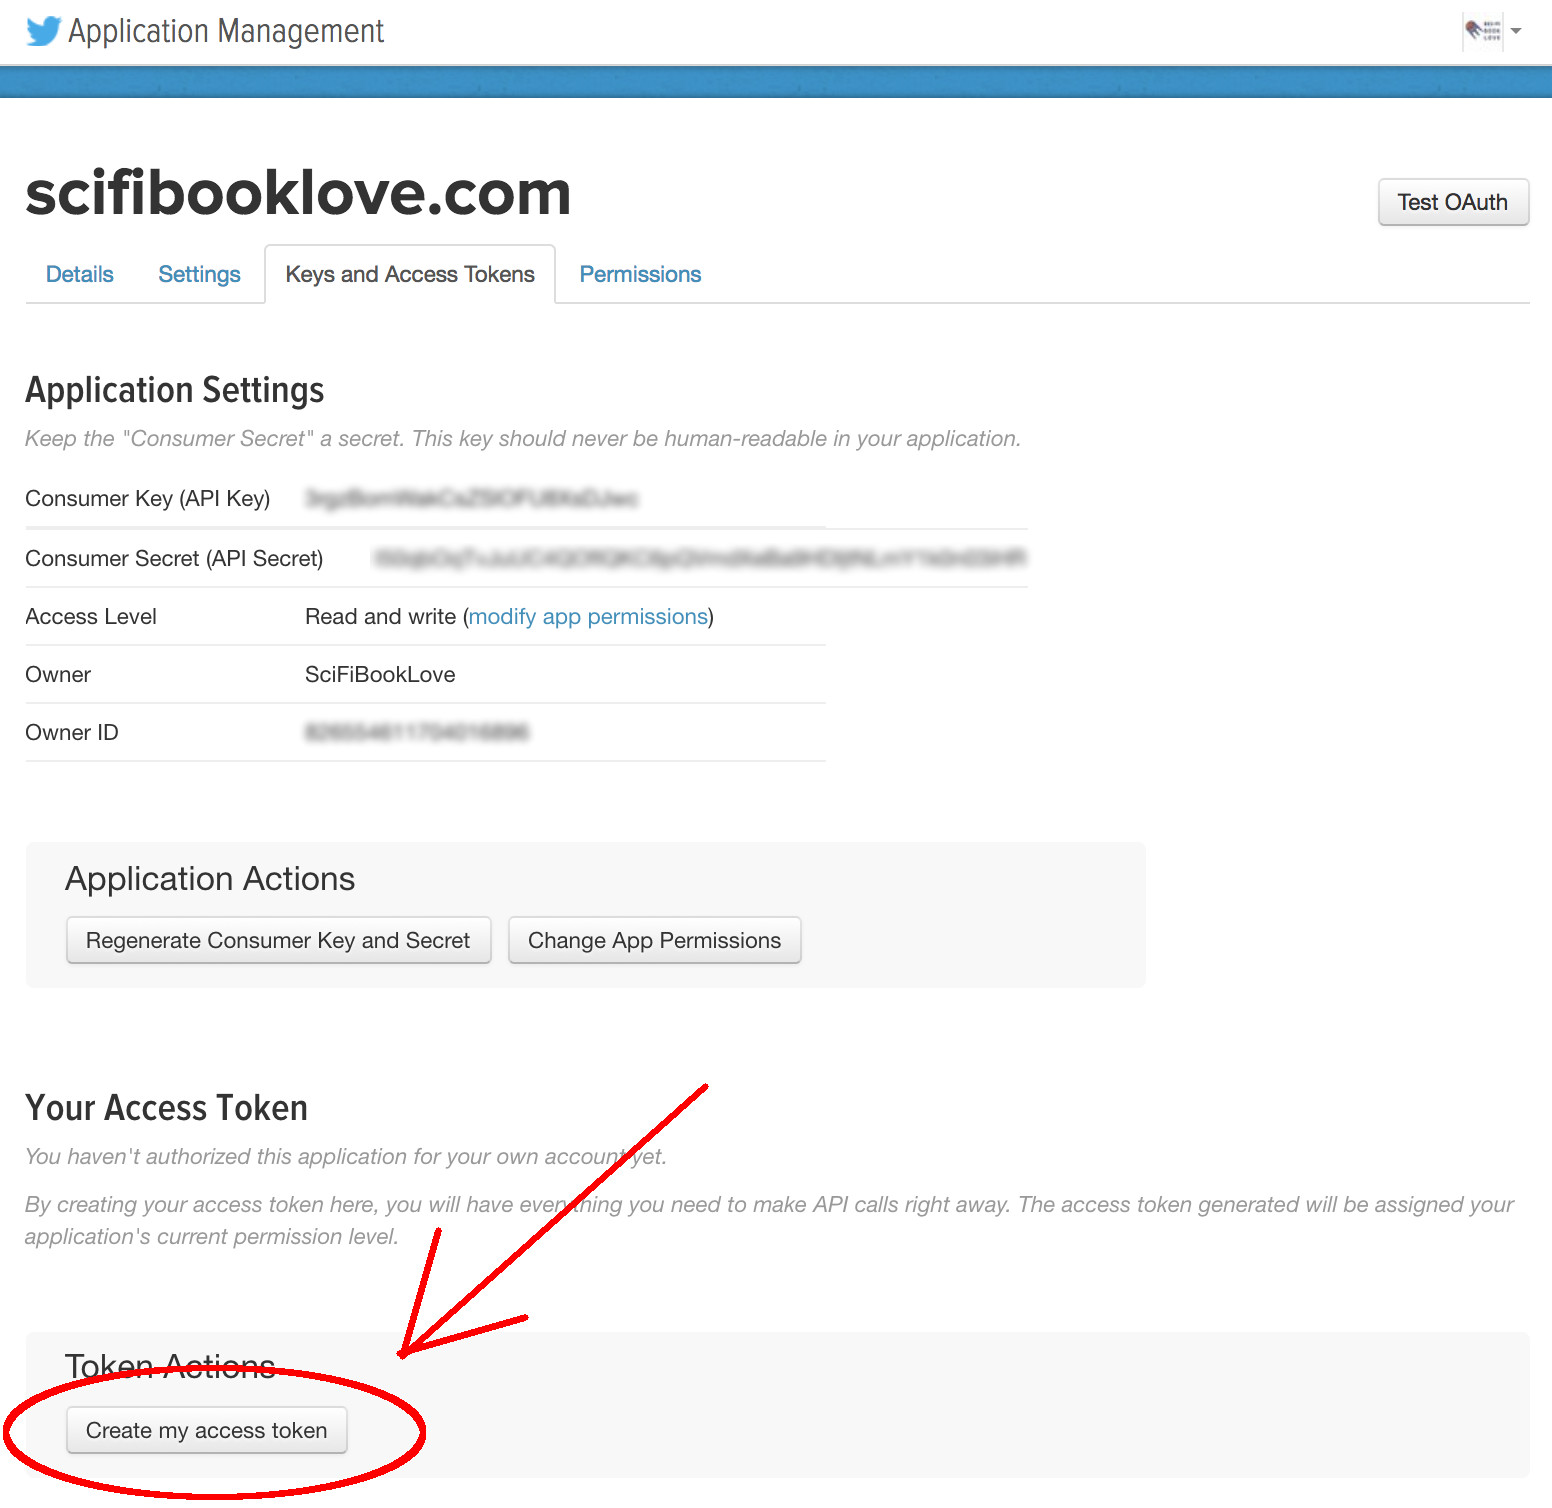
This generates access tokens that allow your new application to access your twitter account (and post on your behalf).
Copy these down along with your Consumer Key and Consumer Secret and save them for your python code (coming up)
![](/images/blogImages/2017-11-03-step_by_step_tutorial_to_post_to_twitter_using_python/6-token_generated.jpg)
Step #2 - Set Up Python Dependencies
Now we need to create a directory for your python twitter posting code and add the dependencies you'll need.
Open up a command line terminal and follow along.
Note: I'm assuming you have python installed already. If not, head over to python.org's beginner's guide for instructions
First create a directory to store our twitter posting python code.
> mkdir simple_twitter_post
> cd simple_twitter_post
Now install a python virtual environment and activate it. If you haven't used python virtual environments before, read up here on why you should be.
> virtualenv venv --distribute
> source venv/bin/activate
Check if you're inside your virtual environment by echoing the bash environment variable $VIRTUAL_ENV
> echo $VIRTUAL_ENV
You should see something like this as a result...
![](/images/blogImages/2017-11-03-step_by_step_tutorial_to_post_to_twitter_using_python/check_venv.jpg)
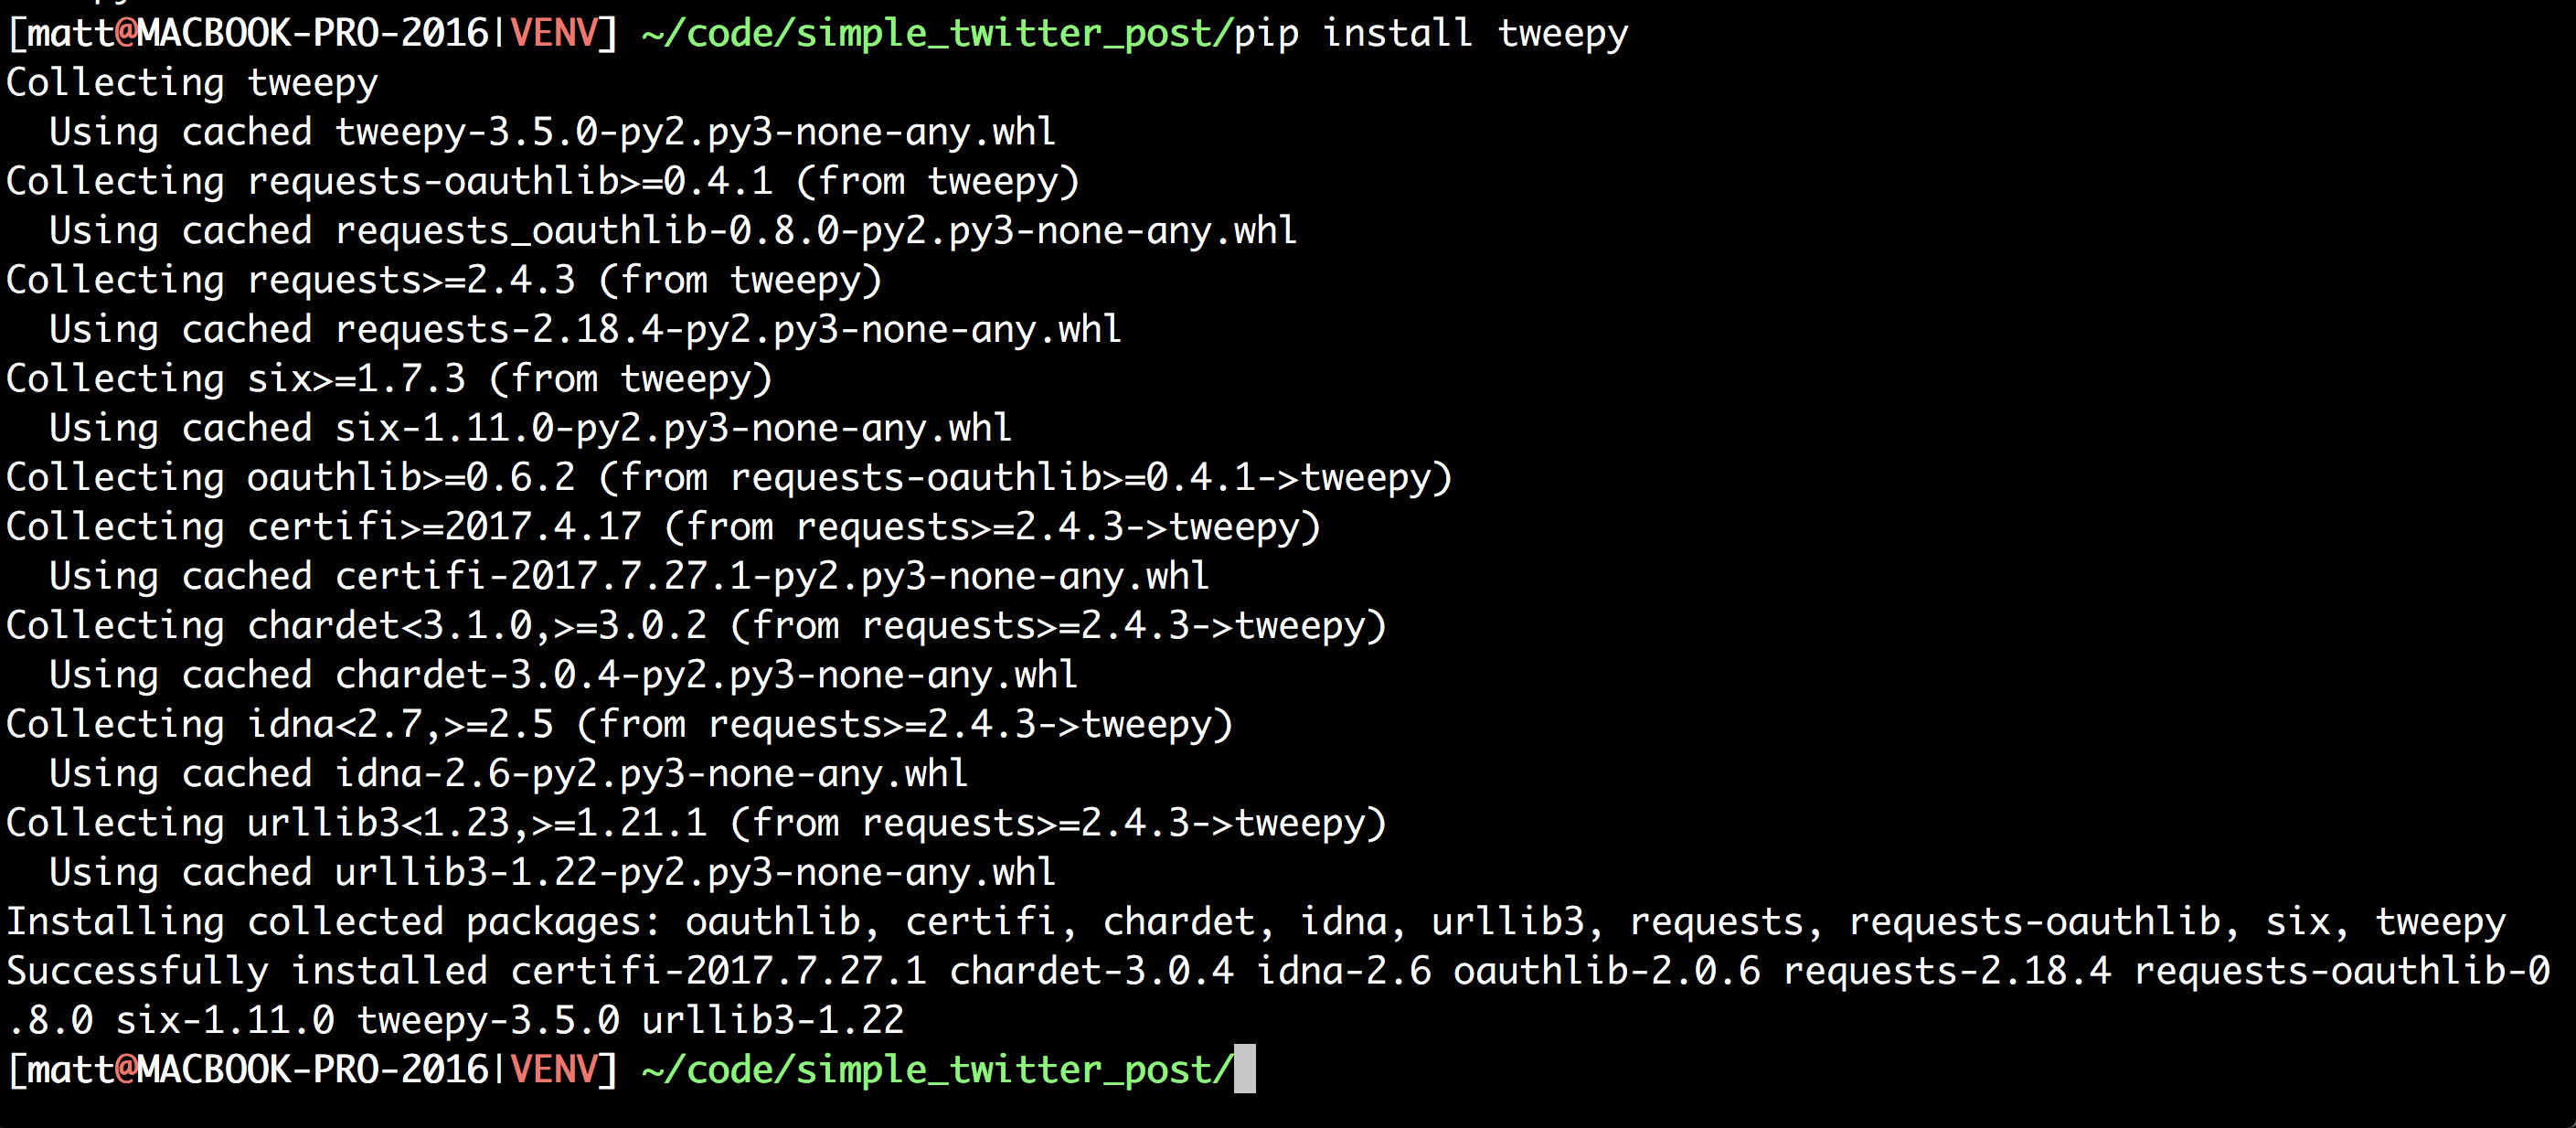
We're going to be using the python package tweepy for doing the heavy lifting of interacting with Twitter's APIs. Install it now.
> pip install tweepy
You should see something like this as a result...
![](/images/blogImages/2017-11-03-step_by_step_tutorial_to_post_to_twitter_using_python/install_tweepy.jpg)
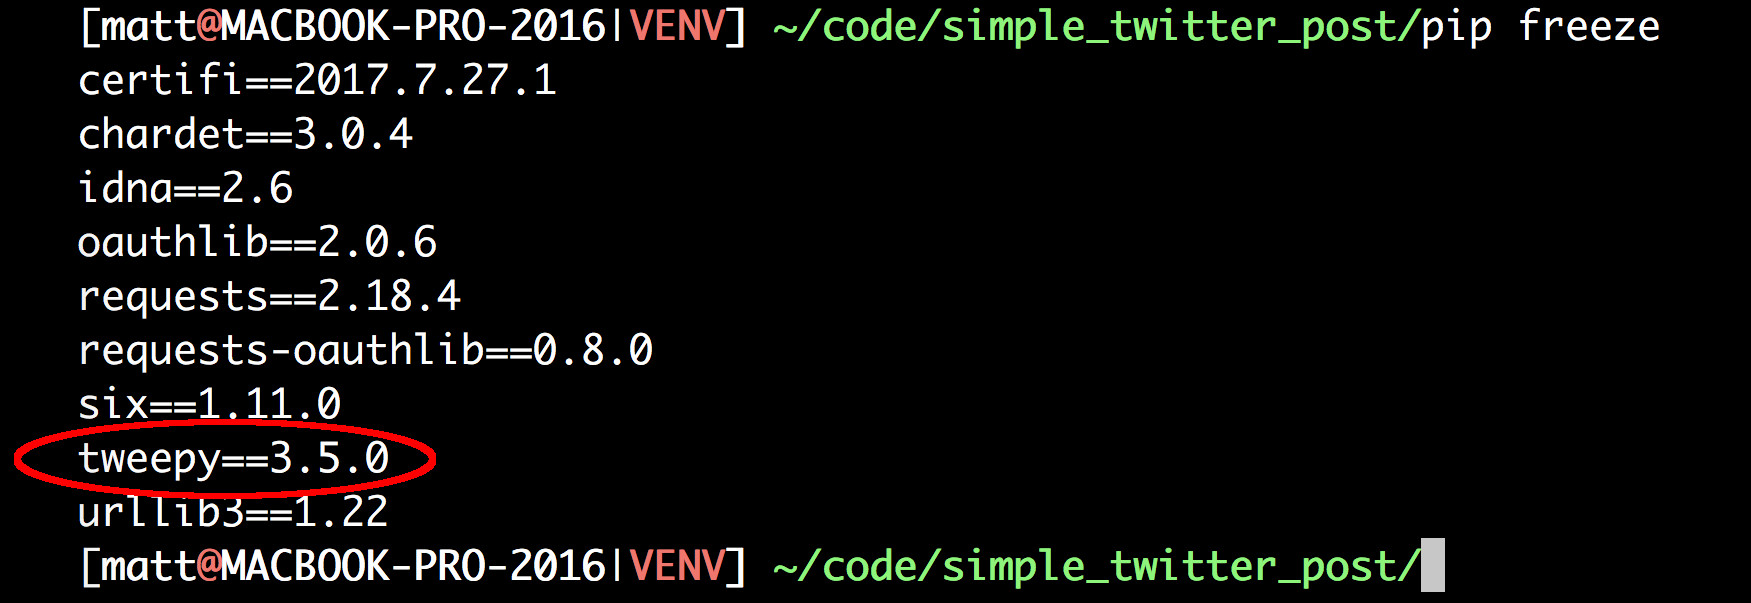
Check and make sure your package was installed by running pip freeze.
> pip freeze
You should see something like this as a result...
![](/images/blogImages/2017-11-03-step_by_step_tutorial_to_post_to_twitter_using_python/pip_freeze.jpg)
Step #3 - Write The Python Code
Ok, you have your python dependencies installed, we're ready to write our twitter posting code. Fire up your favorite code editor and follow along. VIM is mine (obv)
> vim post_tweet.py
Paste in the following code, make sure to substitute your keys and tokens you copied down from the earlier steps above.
import tweepy
def main():
twitter_auth_keys = {
"consumer_key" : "REPLACE_THIS_WITH_YOUR_CONSUMER_KEY",
"consumer_secret" : "REPLACE_THIS_WITH_YOUR_CONSUMER_SECRET",
"access_token" : "REPLACE_THIS_WITH_YOUR_ACCESS_TOKEN",
"access_token_secret" : "REPLACE_THIS_WITH_YOUR_ACCESS_TOKEN_SECRET"
}
auth = tweepy.OAuthHandler(
twitter_auth_keys['consumer_key'],
twitter_auth_keys['consumer_secret']
)
auth.set_access_token(
twitter_auth_keys['access_token'],
twitter_auth_keys['access_token_secret']
)
api = tweepy.API(auth)
tweet = "Another day, another #scifi #book and a cup of #coffee"
status = api.update_status(status=tweet)
if __name__ == "__main__":
main()
Step #4 - Post Your First Tweet
Now we're ready to run our code, fire away
> python post_tweet.py
If everything went right, you should see your brand new tweet on your twitter profile page.
![](/images/blogImages/2017-11-03-step_by_step_tutorial_to_post_to_twitter_using_python/tweet_result.jpg)
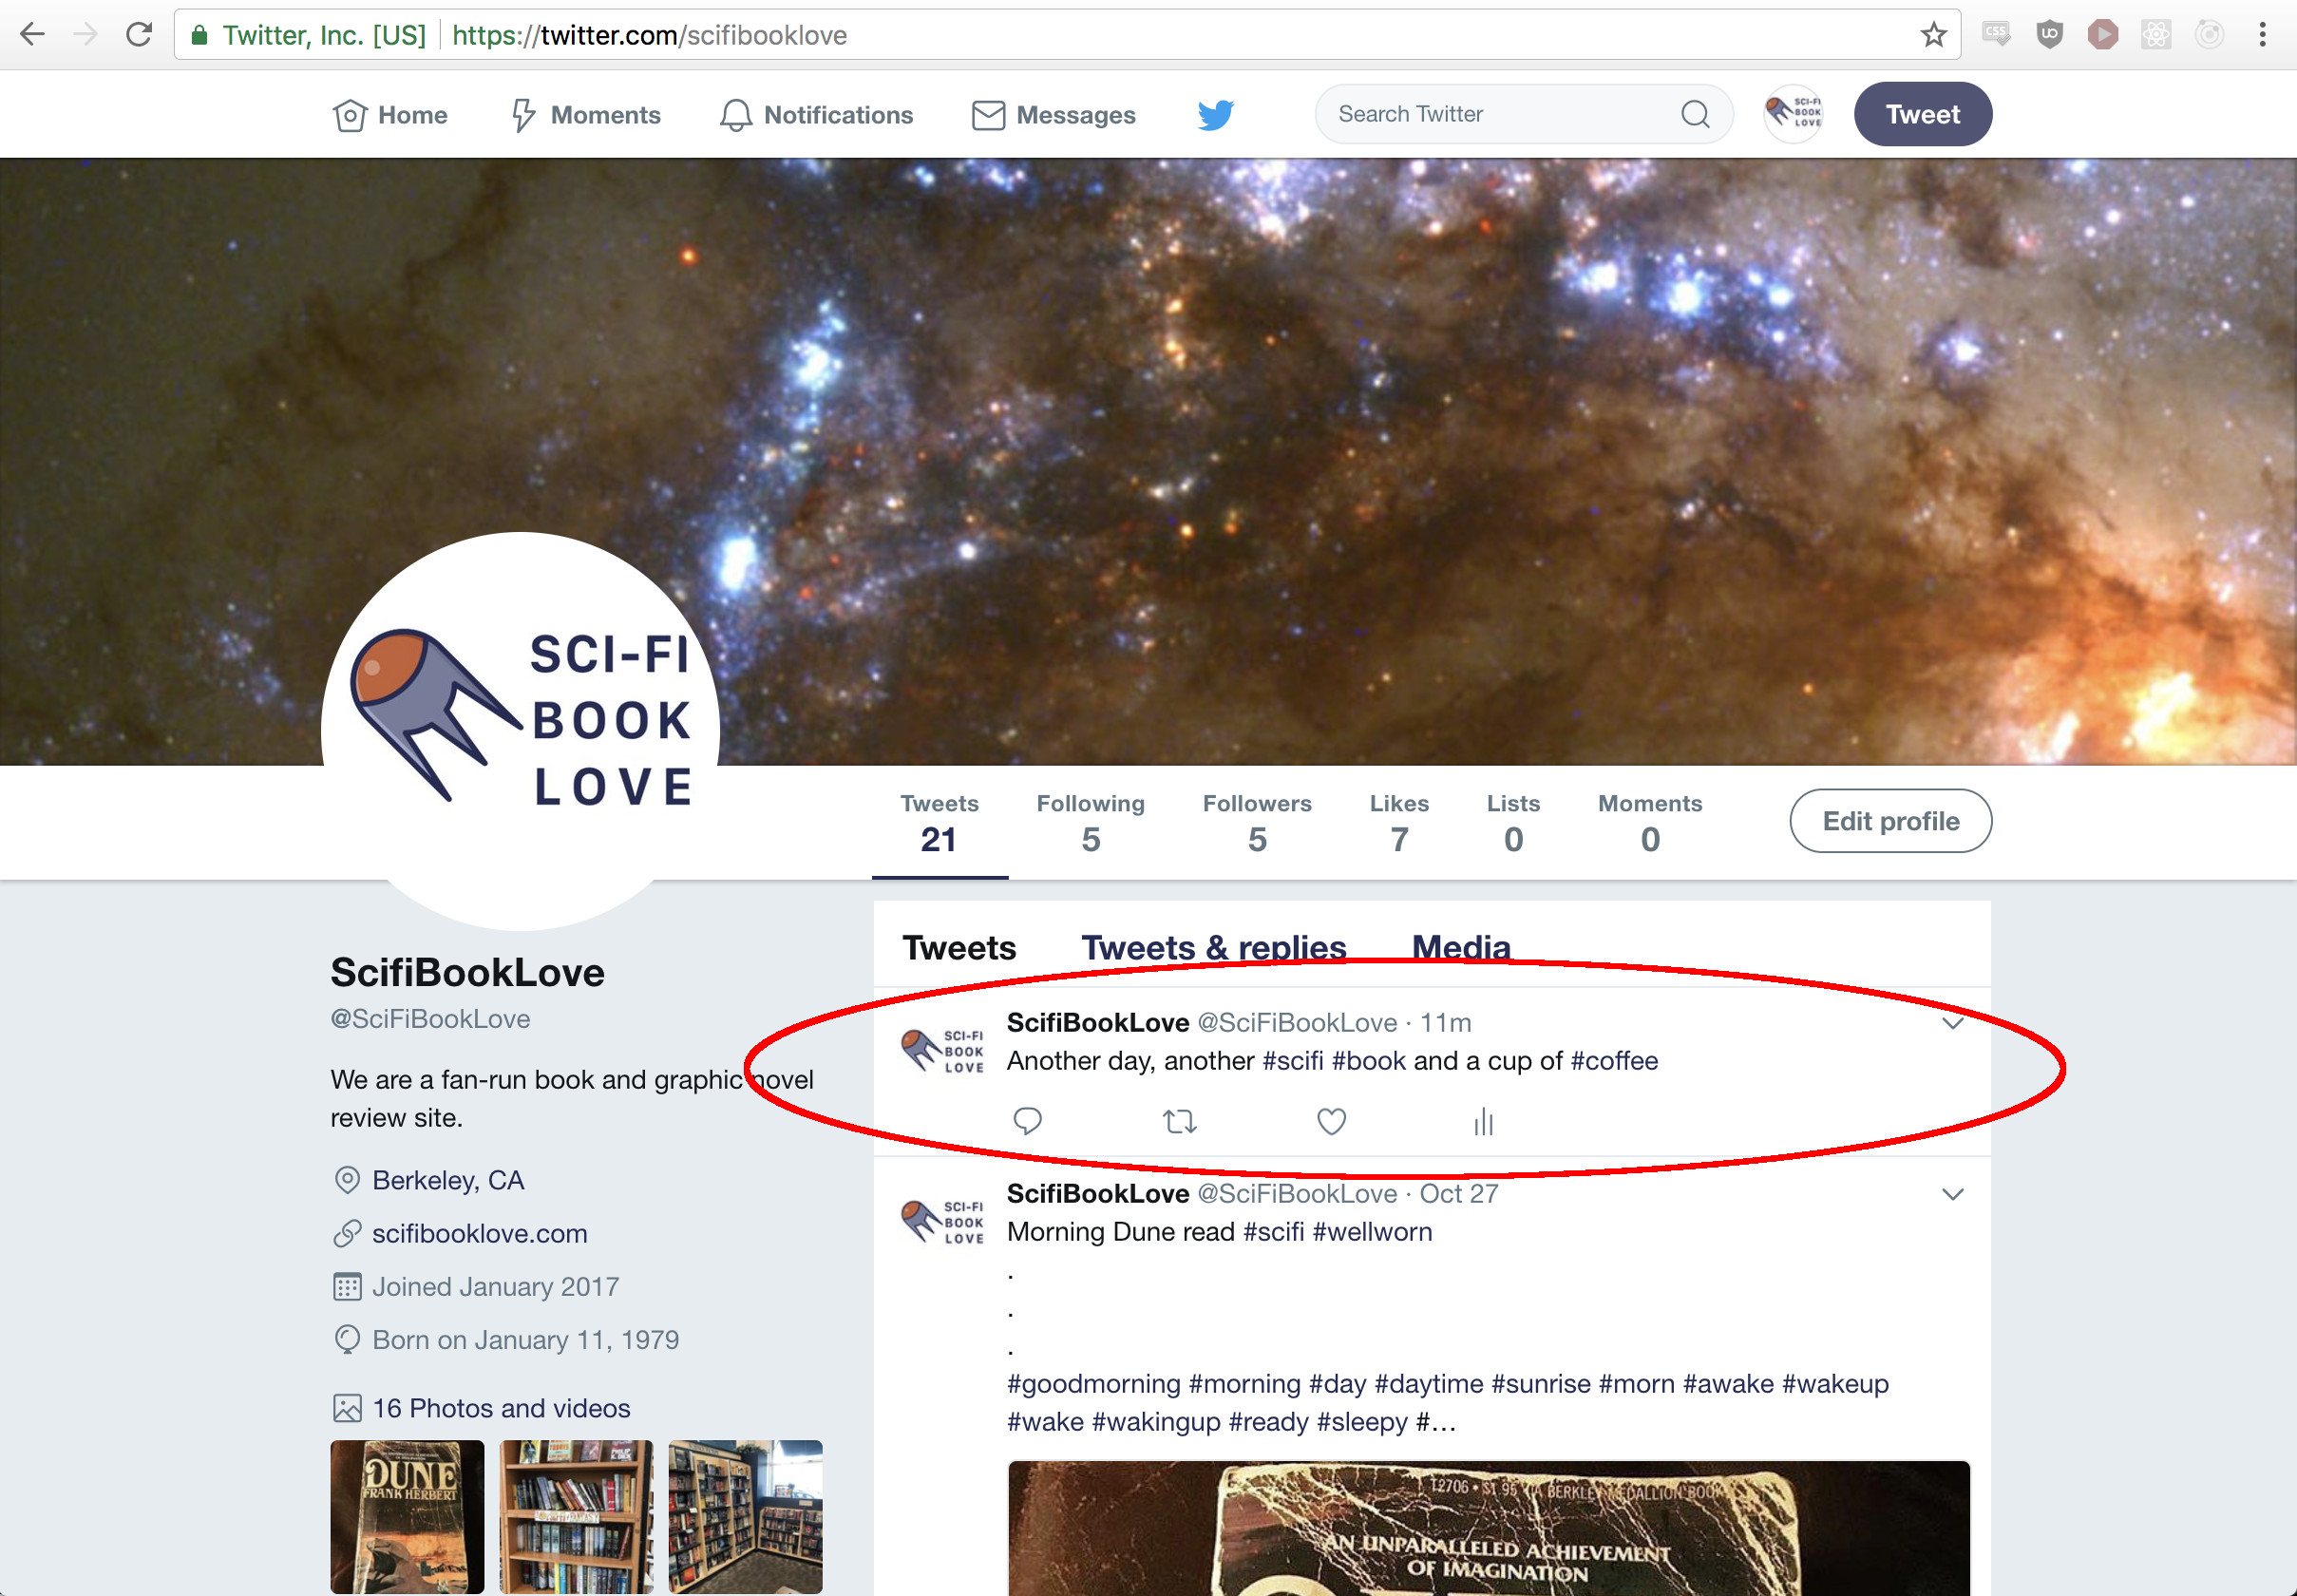
Thanks for reading, I hope you followed along and were able to get a version of this working for yourself. If you're having issues or want to chat, ping me on twitter at @mattccrampton
To: @mattccrampton
0
Other Posts
![Updating File Create Date From Exif Data](/images/blogHeaderImages/2022-03-28-updating-file-create-date-from-exif-data.png)
When exporting photos from a service like Flickr, perhaps after they've given notice that they're going to delete our photos if you don't subscribe to......
![All Truthy and Falsy Javascript Values](/images/blogHeaderImages/2020-04-28_all_truthy_and_falsy_javascript_values.png)
All Truthy and Falsy Javascript Values In Nodejs, every value has an associated boolean, true or false, value. For example, a null value has an......
![Google Forcing Nest Cameras Visual Indicator Light To Be On](/images/blogHeaderImages/2019-08-14-Google_forcing_nest_cameras_visual_indicator_light_to_be_on.png)
Google Forcing Nest Cameras Visual Indicator Light To Be On Received the following email from Google today... Full email text... Recently, we shared our commitment......
![Posting to Twitter with Python - Part Two - Posting Photos](/images/blogHeaderImages/2019-07-06-step_by_step_tutorial_to_post_to_twitter_using_python_part_two-posting_with_photos.png)
Posting to Twitter with Python - Part Two: Posting Photos NOTE: This is part two of my posting to Twitter with Python tutorial. If you......
![Doubleclick to open a file in VIM from OSX](/images/blogHeaderImages/2019-02-19-doubleclick_to_open_in_vim_on_osx.png)
Doubleclick to open a file in VIM from OSX I use VIM for just about everything from note taking to coding to keeping track of......
![Sign Into Gmail Without Signing Into Google Chrome](/images/blogHeaderImages/2018-09-26-sign-into-gmail-without-signing-into-google-chrome.png)
Sign Into Gmail Without Signing Into Google Chrome Unfortunately, Google has made changes to Chrome since this blog post was posted which removed the options......
Other Software Development Blog Posts
![Updating File Create Date From Exif Data](/images/blogHeaderImages/2022-03-28-updating-file-create-date-from-exif-data.png)
![All Truthy and Falsy Javascript Values](/images/blogHeaderImages/2020-04-28_all_truthy_and_falsy_javascript_values.png)
![Google Forcing Nest Cameras Visual Indicator Light To Be On](/images/blogHeaderImages/2019-08-14-Google_forcing_nest_cameras_visual_indicator_light_to_be_on.png)
![Posting to Twitter with Python - Part Two - Posting Photos](/images/blogHeaderImages/2019-07-06-step_by_step_tutorial_to_post_to_twitter_using_python_part_two-posting_with_photos.png)
![Doubleclick to open a file in VIM from OSX](/images/blogHeaderImages/2019-02-19-doubleclick_to_open_in_vim_on_osx.png)
![Sign Into Gmail Without Signing Into Google Chrome](/images/blogHeaderImages/2018-09-26-sign-into-gmail-without-signing-into-google-chrome.png)
![Four Steps To Write An OSX AppleScript to Gather ALL Windows](/images/blogHeaderImages/2018-08-03-applescript_to_gather_all_windows_on_osx.png)
![Four Simple Steps To Post To Twitter Using Python](/images/blogHeaderImages/2017-11-03-step_by_step_tutorial_to_post_to_twitter_using_python.jpg)
![The Mega List Of Free Image Sites For Blogging](/images/blogHeaderImages/2017-11-01-mega_list_of_free_image_sites_for_blogging.jpg)
![A VIM User's Experiments With GUI Code Editors](/images/blogHeaderImages/2017-10-30-a_vim_users_experiments_with_gui_code_editors.png)
![All Python Assert Methods In One List](/images/blogHeaderImages/2017-08-04-a_list_of_all_python_assert_methods.png)
![Invalidate All Cloudfront Files](/images/blogHeaderImages/invalidating_all_files_from_a_cloudfront_distribution_cache_from_the_command_line.png)
![Query an NTP server from Python](/images/blogHeaderImages/88291892461.png)
![Mac Terminal WiFi Commands](/images/blogHeaderImages/64144666914.png)
![Running a for-loop over a Jinja2 dictionary](/images/blogHeaderImages/2012-09-09-iterating_over_a_dict_in_a_jinja_template.png)
Other Blog Posts
![209 Netfix Categories You Dont Know About](/images/blogHeaderImages/2018-09-12-209-netflix-categories-you-dont-know-about.png)
![Easy Recipe For Making Chili at Home with Matt Crampton](/images/blogHeaderImages/2017-11-09-how_to_make_easy_chili.png)
Media Appearances
![Wall Street Journal Live Interview with Matt Crampton](/images/blogHeaderImages/2017-10-26-wsj_live_interview.png)
![NBC Press Here interview with Matt Crampton](/images/blogHeaderImages/2017-10-26-nbc_press_here.png)
![Mobile Monday Silicon Valley panel with Matt Crampton](/images/blogHeaderImages/2017-10-26-mobile_monday_panel.png)
![Human Cloud panel with Matt Crampton](/images/blogHeaderImages/2017-10-26-human_cloud_panel.png)
![Fox Business Interview with Matt Crampton](/images/blogHeaderImages/2017-10-26-fox_business_interview.png)
![Fox Business interview on furloughed government workers with Matt Crampton](/images/blogHeaderImages/2017-10-26-fox_business_furloughed_workers_interview.png)
![Fortune Magazine Live Interview with Matt Crampton](/images/blogHeaderImages/2017-10-26-fortune_magazine_interview.png)
![CCTV Interview with Matt Crampton](/images/blogHeaderImages/2017-10-26-cctv_interview.png)
![8th and Walton show interview with Matt Crampton](/images/blogHeaderImages/2017-10-26-8th_walton_interview.png)
Print Interviews
![MLive Interview with Matt Crampton](/images/blogHeaderImages/2019-04-25-mlive_interview.png)
![Techcrunch Interview on Gigwalk with Matt Crampton](/images/blogHeaderImages/2017-10-26-techcrunch_interview.png)
![Salon.com Labormetrics Interview with Matt Crampton](/images/blogHeaderImages/2017-10-26-salon_labormetrics_interview.png)
![Huffington Post Interview with Matt Crampton](/images/blogHeaderImages/2017-10-26-huffington_going_against_the_flow.png)
![CBS Pulse Interview with Matt Crampton](/images/blogHeaderImages/2017-10-26-cbs_pulse_article.png)
![Silicon Valley Business Journal - Best CIO - Matt Crampton](/images/blogHeaderImages/2014-06-20-silicon_valley_business_journal_best_cio_matt_crampton.png)